A Complete Guide to Managing Organizations

Whether you're a team lead, engineering manager, or L&D professional, ZeroToArchitect's Organizations feature lets you centralize billing, distribute licenses in bulk, and track the progress of every member on your team, all from a single dashboard.
In this guide, we'll walk through the entire process step by step:
Creating an organization
Purchasing bulk licenses
Generating invite codes for your team
Assigning licenses to members
Let's get started.
Step 1: Create an Organization
An organization is your team's home on ZeroToArchitect. It's where you manage members, licenses, and track progress.
Navigate to the Organizations Page
Once you're logged in, click Organizations in the navigation menu. You'll land on the Organizations page, which lists all organizations you belong to as an admin.
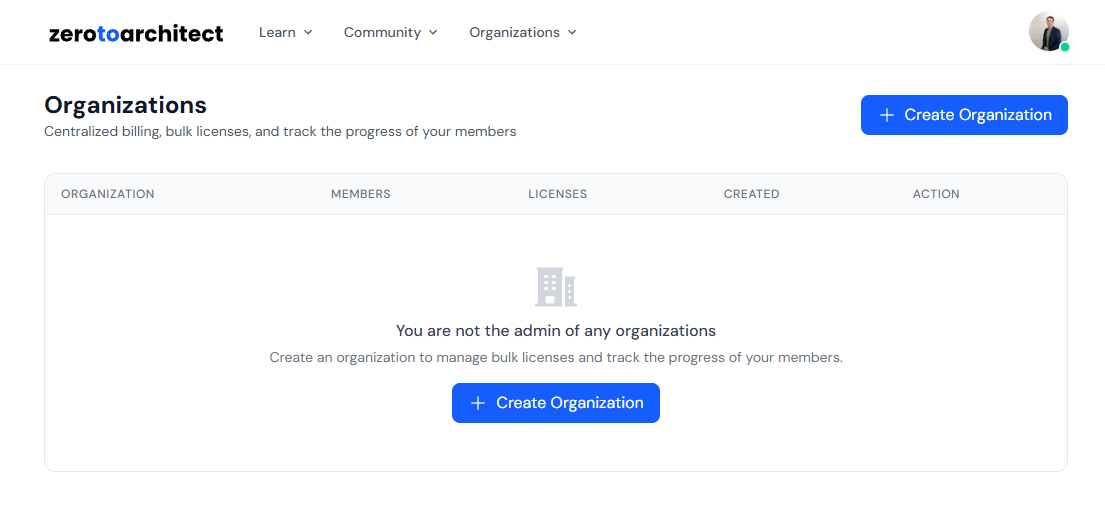
Create Your Organization
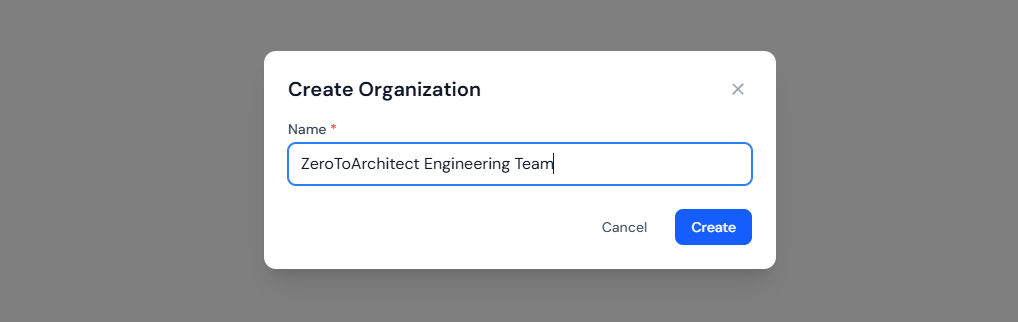
Click the Create Organization button in the top-right corner. A modal will appear with the following field:
Name (required) — The name of your organization (e.g., "Company Engineering Team")
Fill in the details and click Create.
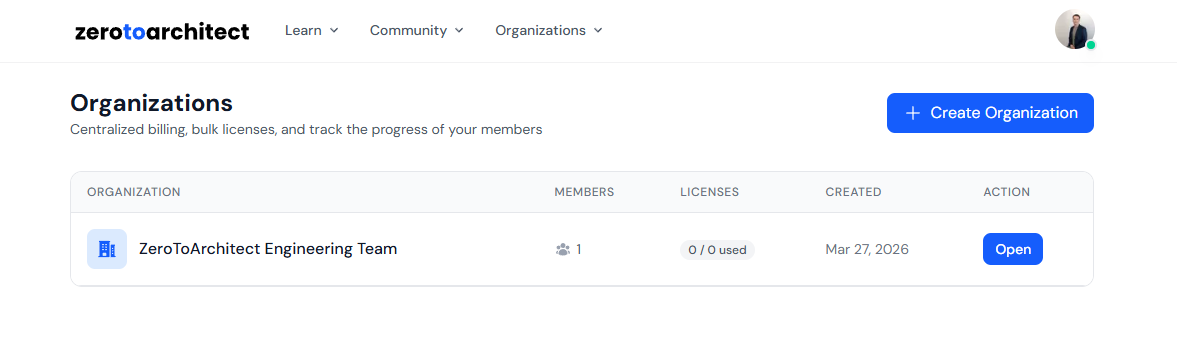
That's it — your organization is created and you'll be redirected to the organization dashboard. You're automatically added as the Owner, which gives you full administrative control.
Step 2: Buy Bulk Licenses
Now that your organization exists, let's purchase licenses so your team members get access to ZeroToArchitect content.
Navigate to the Licenses Tab
On your organization's detail page, click the Licenses tab. If this is a new organization, you won't have any licenses yet.
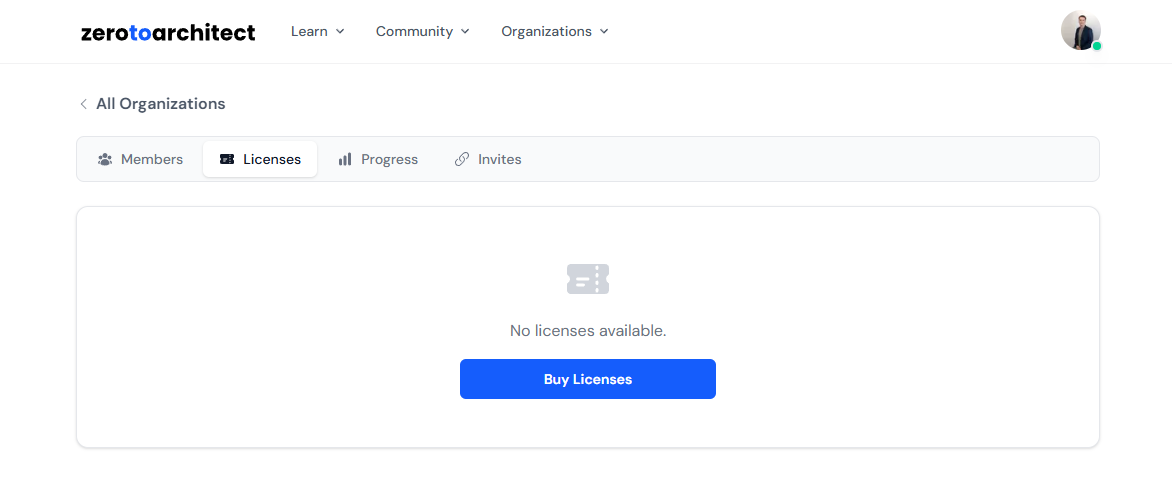
Purchase Licenses
Click the Buy Licenses button. A modal will appear where you can:
Select a product — Choose which ZeroToArchitect product you'd like to buy licenses for (e.g. AI-102 Exams Bundle or All Exams Bundle)
Enter quantity — Specify how many licenses you need
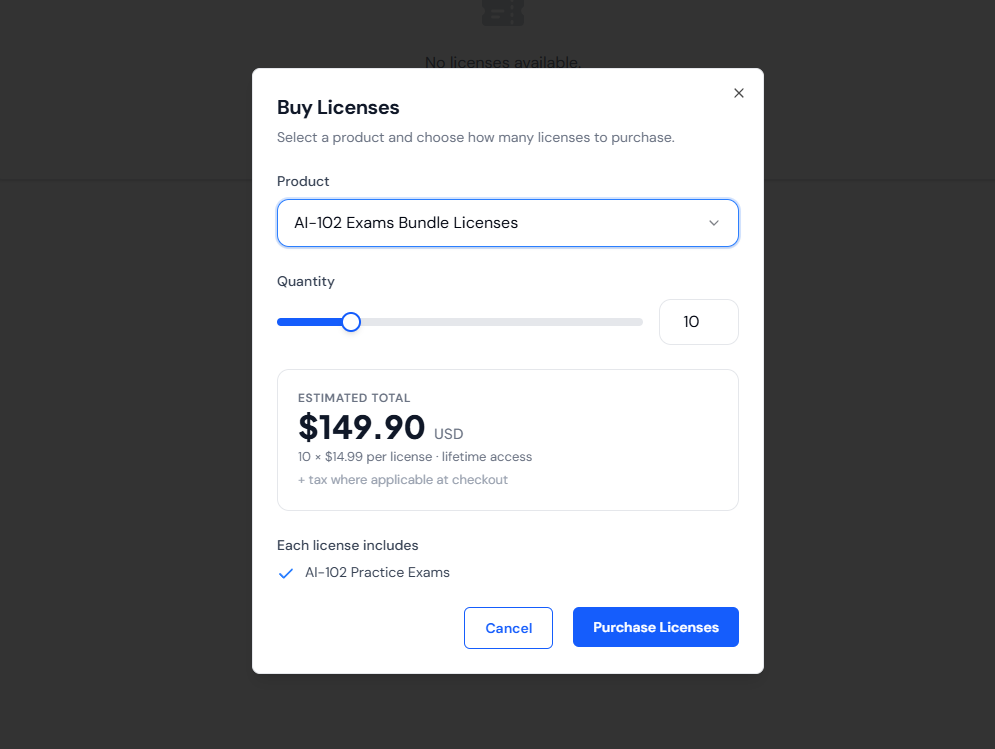
Click Continue to proceed to checkout. You'll be taken to our payment provider to complete the purchase.
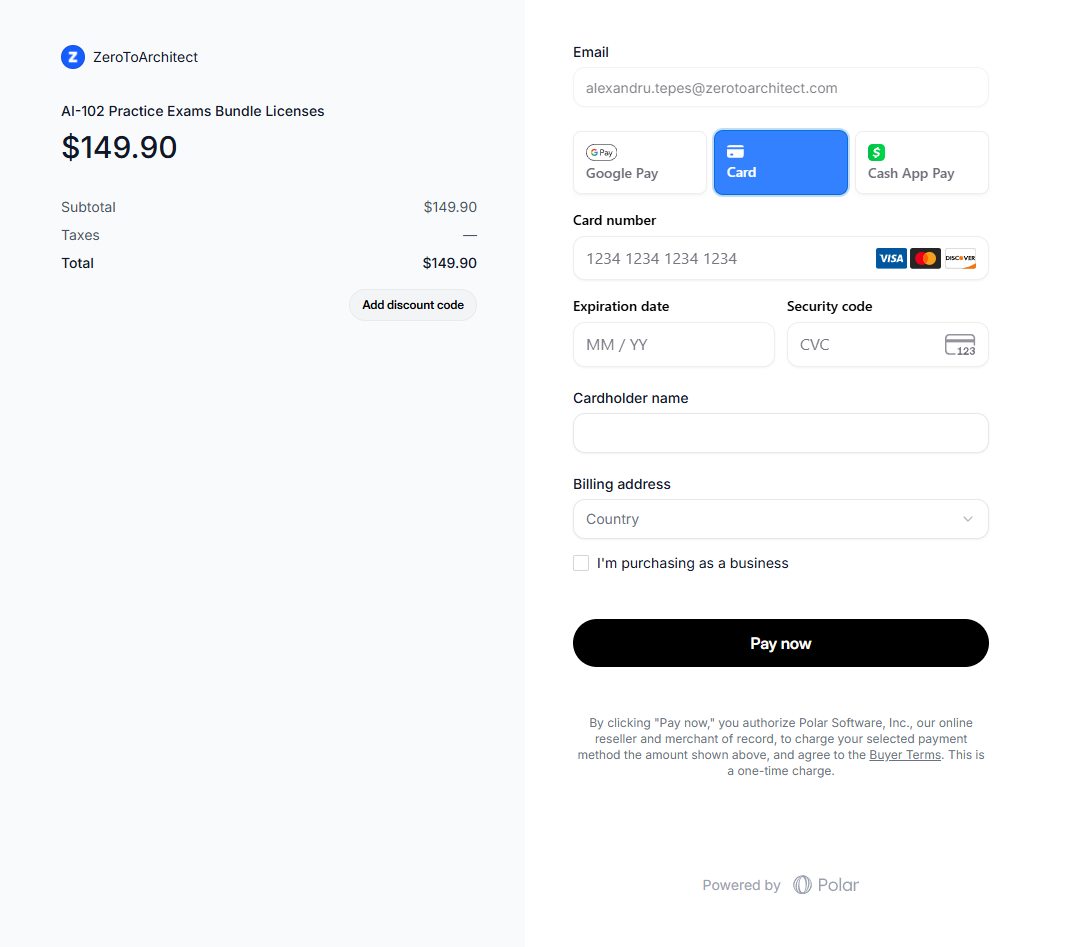
Once payment is complete, you'll be redirected back to your organization's Licenses tab. You may briefly see a "Processing your purchase..." banner while the licenses are being provisioned — this usually only takes a few seconds.
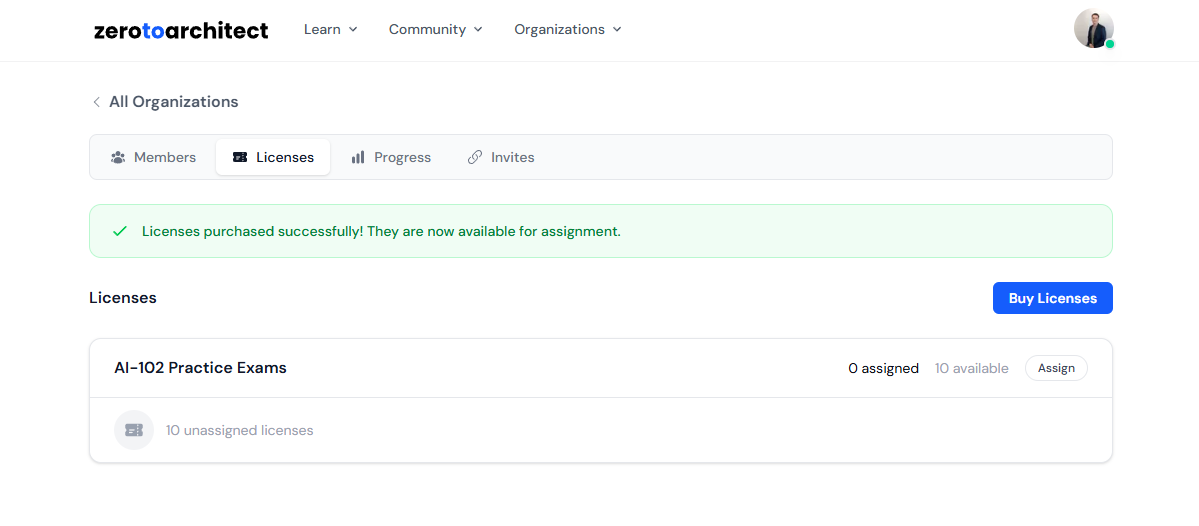
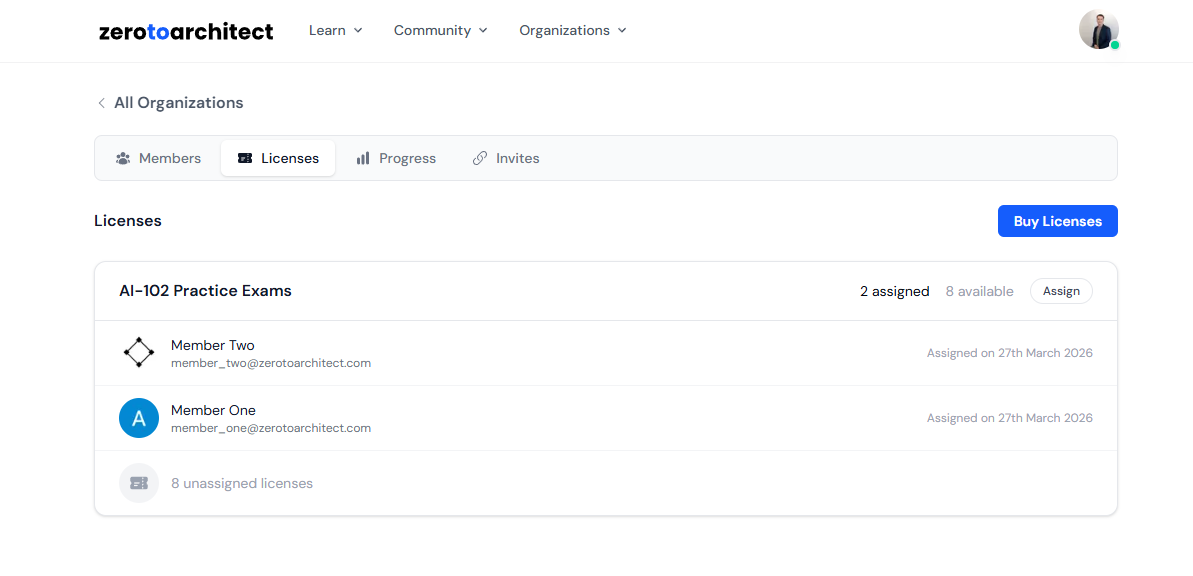
Once processing is complete, your new licenses will appear in the Licenses tab, grouped by product. You'll see a summary showing:
Total licenses purchased
Assigned licenses (currently in use)
Available licenses (ready to be assigned)
Step 3: Create Invite Codes
Before you can assign licenses, you need team members in your organization. The easiest way to bring people in is through invite codes — shareable links that anyone can use to join your organization.
Navigate to the Invites Tab
On your organization's detail page, click the Invites tab.
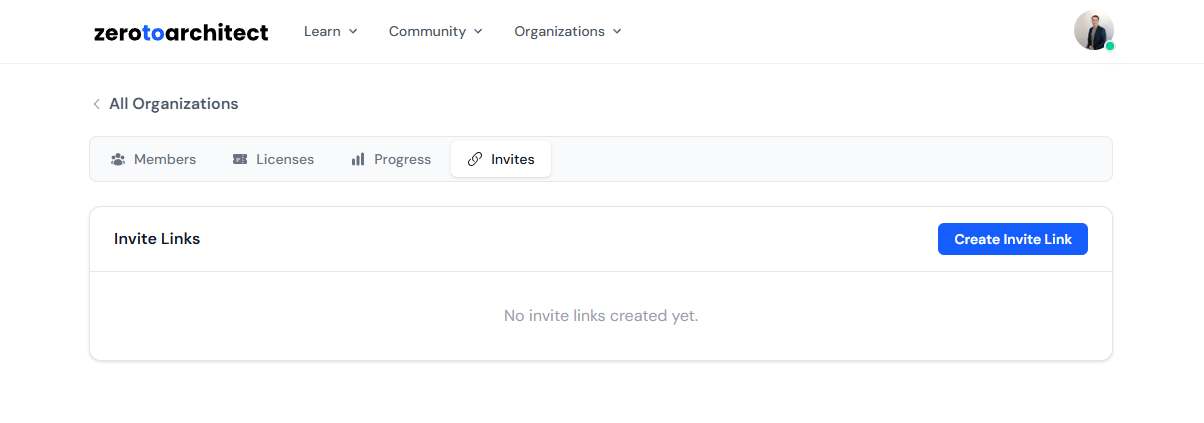
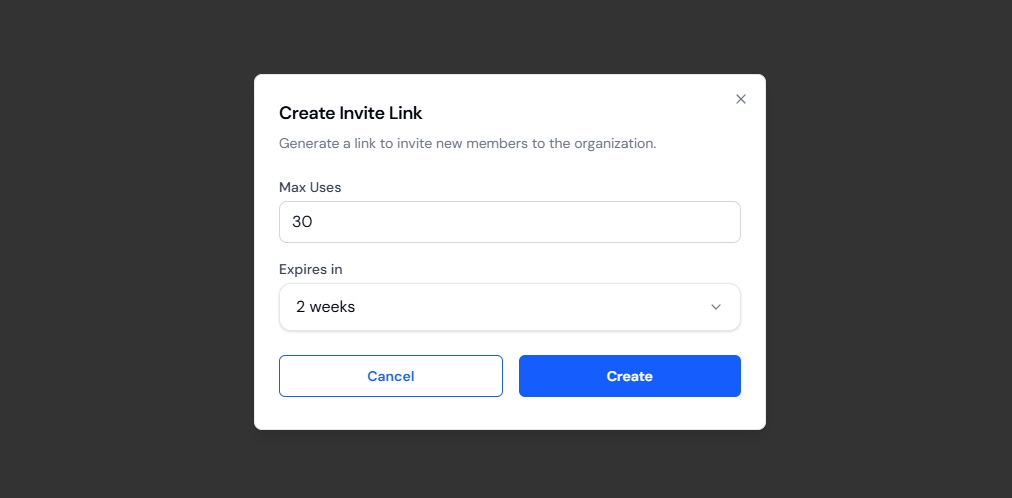
Generate an Invite Link
Fill in the invite details:
Max Uses — Limit how many people can use this invite link.
Expires In — Set an expiration time for the invite.
Click Create Invite to generate the link.
Your new invite code will appear in the list below the form. Each invite shows:
Usage count (e.g., "3 / 30 used")
Expiration date
The invite link (with a copy button)
A delete button to revoke the invite

Share the Invite Link
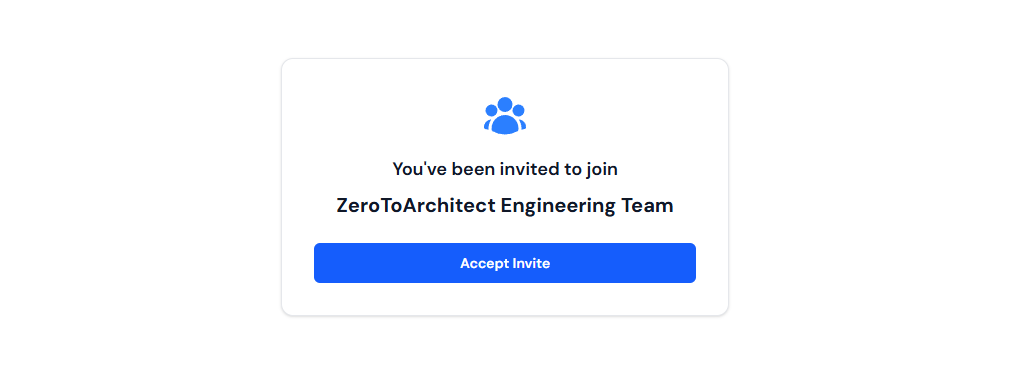
Copy the invite link and share it with your team via email, Slack, or any other communication channel. When a team member clicks the link:
If they're not logged in, they'll be prompted to sign up or log in first, then automatically redirected back to the invite.
If they're logged in, they'll see a preview of your organization and can click Accept to join.
Step 4: Assign Licenses to Members
Once your team members have joined, you'll need to assign licenses so they can access the content.
Navigate to the Licenses Tab
Go back to the Licenses tab on your organization detail page. You'll see your licenses grouped by product.
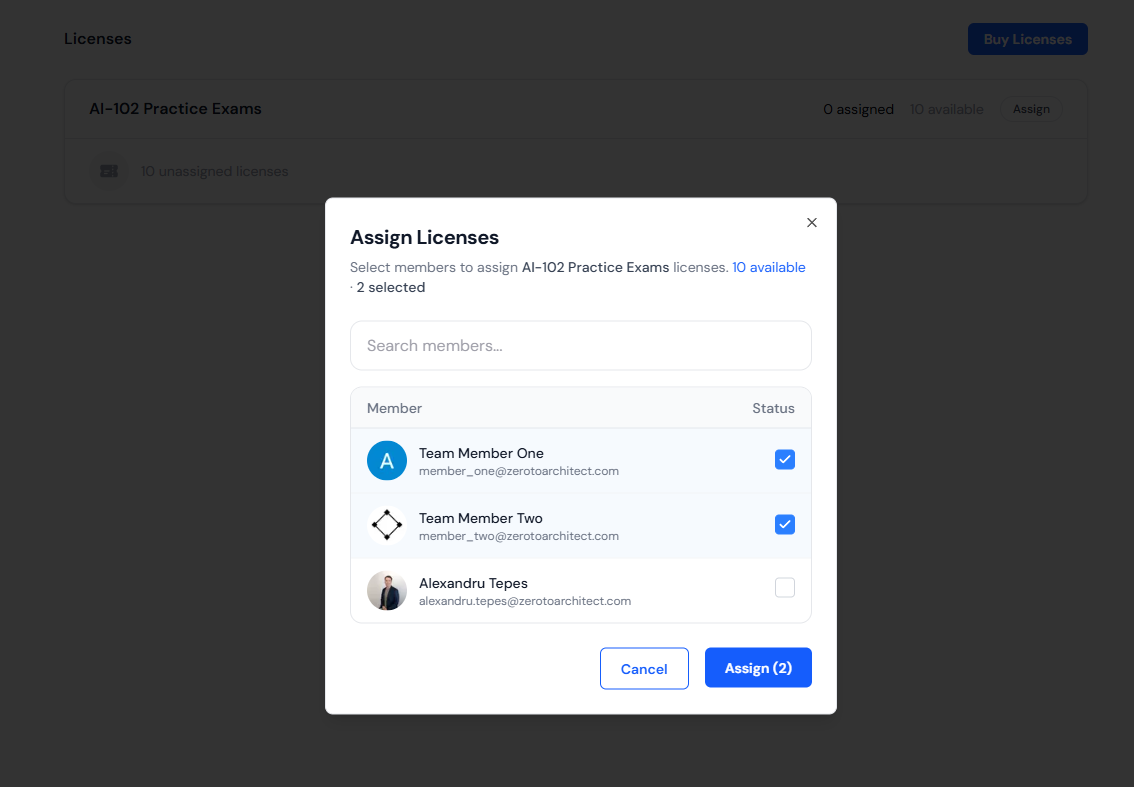
Assign a License
Click the Assign button next to the product you want to assign. A modal will appear showing:
Available (unassigned) licenses for that product
Organization members who don't already have a license for this product
Select the licenses and members you'd like to match up, then click Assign.
Once assigned, the member immediately gains access to the product. The license will show as assigned in the Licenses tab with the member's name and the assignment date.
Getting Started
Ready to set up your team? Head to the Organizations item in the header or the link down below and create your first organization today. If you have any questions, don't hesitate to reach out to our support team.
Manage your Organizations
Want to pass your next certification?
Start practicing with real exam-style questions today. Gain confidence, spot your weak points, and be fully prepared to pass your certification.
Azure AI Engineer
For developers creating and deploying AI solutions. Covers computer vision, NLP, knowledge mining, and generative AI, proving skills in integrating AI services within Azure.
Azure Administrator
For IT admins managing Azure infrastructure. Covers identity, storage, networks, and compute resources - essential for administration and operations roles.

Azure Solutions Architect
For architects designing cloud solutions on Azure. Covers infrastructure, security, data platforms, and business continuity - essential for leading enterprise cloud initiatives.
Azure Fundamentals
Entry-level certification for beginners in cloud computing. It covers core Azure concepts, services, security, and compliance - ideal for both technical and non-technical roles wanting a foundation in Azure.

Azure Network Engineer
For network engineers managing Azure networking. Covers hybrid connectivity, routing, security, and private access to Azure services - critical for enterprise network infrastructure.

Azure Security Engineer
For security professionals protecting Azure environments. Covers identity management, platform protection, security operations, and data security - vital for cloud security roles.
Azure AI Fundamentals
Fundamentals certification for understanding AI concepts and building simple solutions with Microsoft Foundry. Covers responsible AI, generative and agentic AI, speech, vision, language, and content understanding.
ML Ops and Gen AI Solutions
Advanced certification for designing and implementing production AI solutions. Covers RAG architectures, model evaluation, fine-tuning, orchestration, observability, and responsible AI patterns in Azure.