
How to Manage Your Organization using Groups

If your organization has grown beyond a handful of members, keeping track of who's who can get messy quickly. Organizations inside ZeroToArchitect support Groups, which are a way to organize your members into named cohorts so you can manage your them more clearly.
Groups are ideal for situations like:
- Separating engineers by team or department
- Tracking a learning cohort going through a certification together (e.g., "AZ-500 Cohort — June 2026")
- Segmenting contractors from full-time staff
In this guide, we'll walk through:
- Creating a group
- Adding members to a group
- Renaming or deleting a group
- Removing a member from a group
Let's get started.
Create a new group
Go to Organizations -> Manage your Organizations in the navigation menu and click on your organization. You'll land on the organization dashboard showing the Members tab by default.
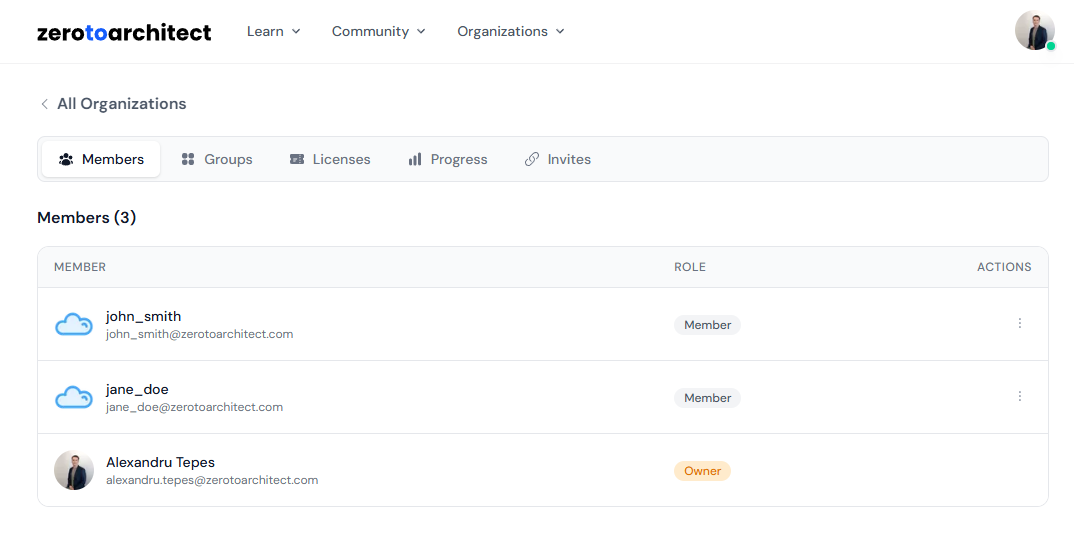
Click the Groups tab, it's the second tab, right after Members. If you haven't created any groups yet, you'll see an empty state.
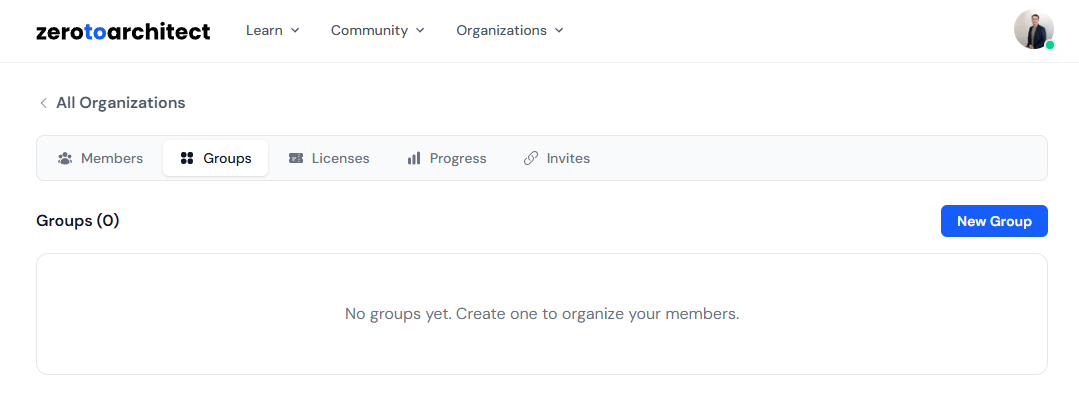
Click the New Group button in the top-right corner. A dialog will appear prompting you to enter a name for the group.
Type a descriptive name that clearly identifies the cohort or segment — for example:
AZ-500 Cohort — June 2026Backend Engineering TeamContractors — Q2
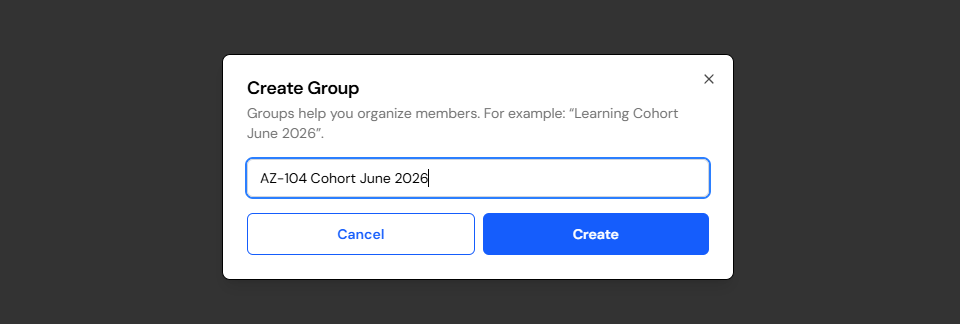
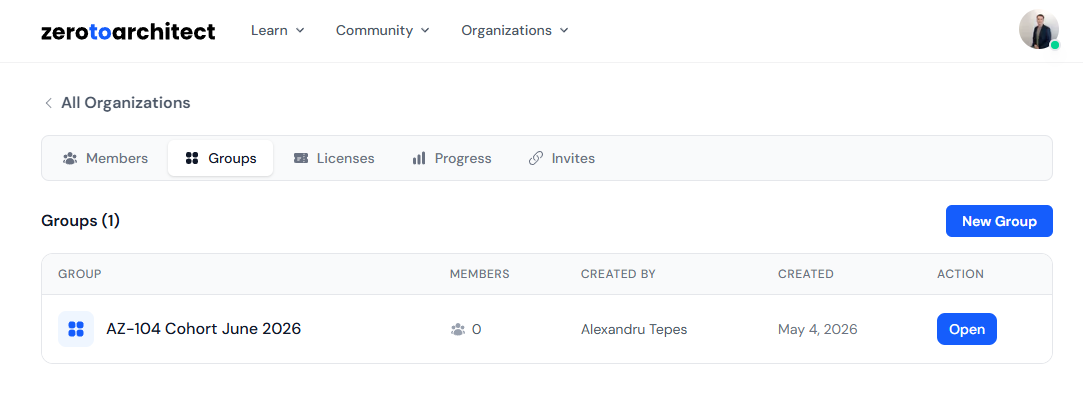
Click Create to save the group.
Add Members to a Group
Click on a group name in the list to open its detail view. You'll see a breadcrumb at the top (Groups → Group Name) and a list of current members below, which will be empty for a new group.
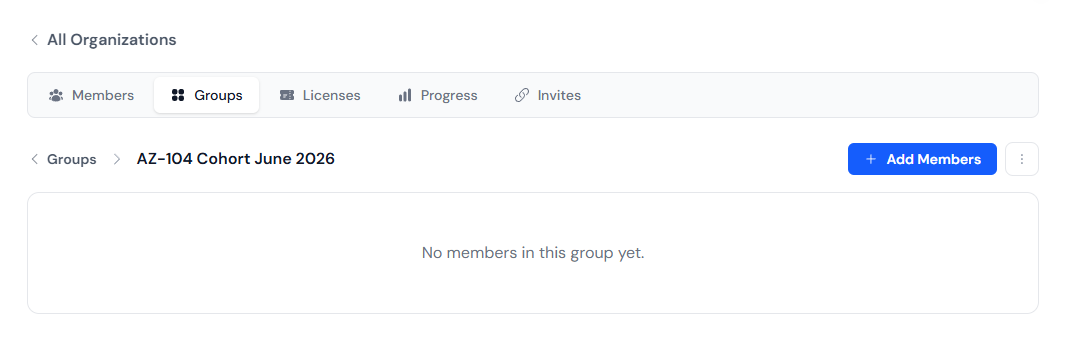
Click the Add Members button in the top-right area of the group detail. A dialog will appear with a checklist of all organization members who aren't already in this group.
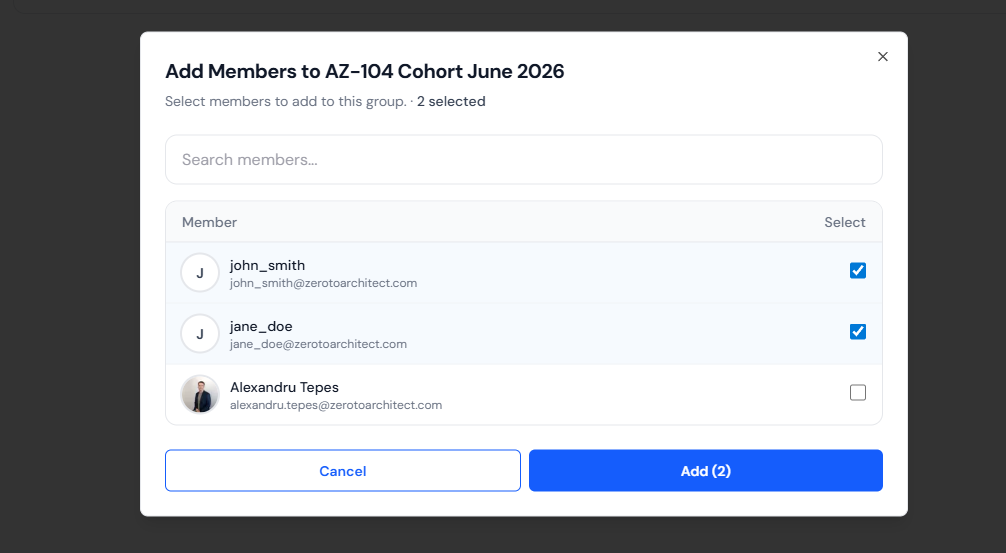
Select the members you'd like to include and click Add. They'll immediately appear in the group's member list.
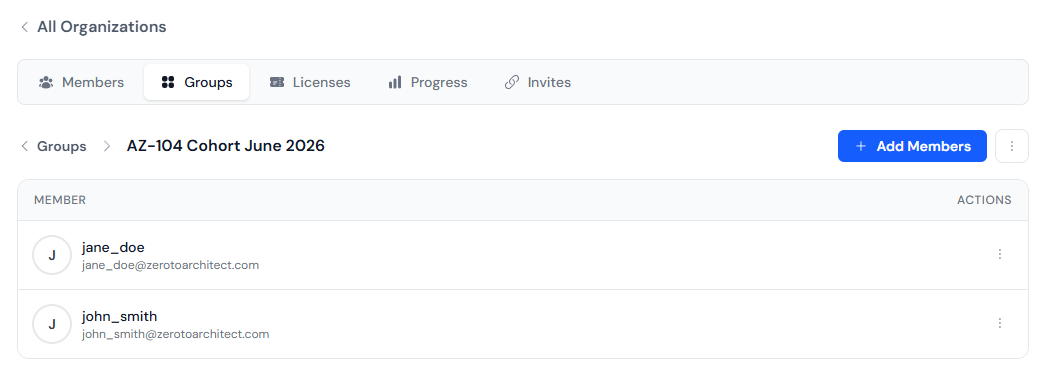
Note: A member can belong to multiple groups. Adding someone to a group doesn't affect their organization role or license assignment, groups are purely for organization.
Rename or Delete a Group
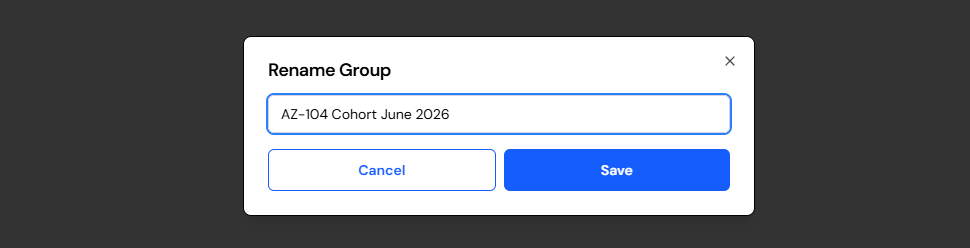
To rename a group, from inside a group's detail view, click the Rename button.
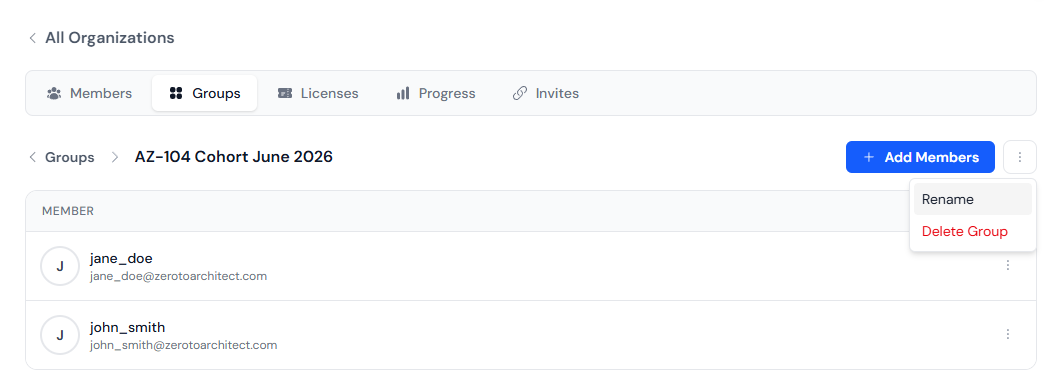
A dialog will appear with the current name pre-filled. Update it and click Save.
To delete a group, click the Delete Group button. A confirmation dialog will ask you to confirm before proceeding.
Deleting a group removes only the group, it does not remove any members from your organization or revoke any licenses.
Remove a Member from a Group
From inside a group's detail view, find the member you'd like to remove and click the the three dots button on their row. From there, select the "Remove from Group" option.
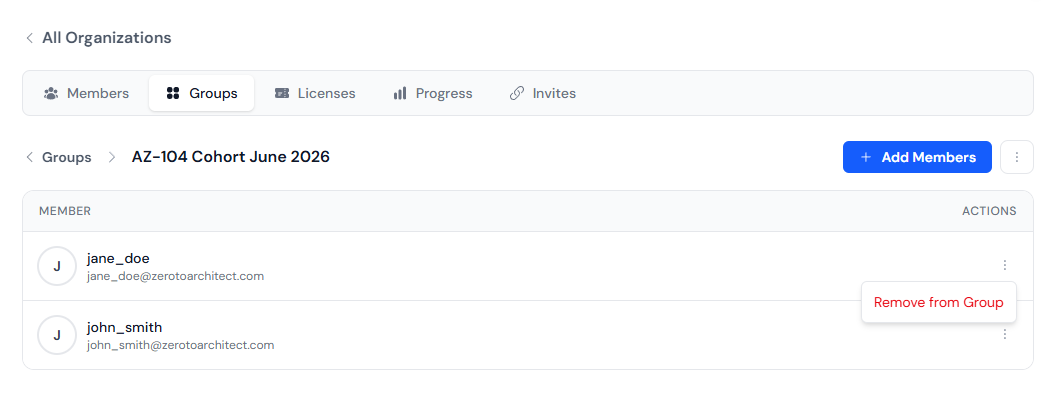
The member will be removed from the group, however they will remain in the organization with all their licenses intact.

Note: If a member leaves the organization entirely, they are automatically removed from all groups they belonged to.
View Progress for a Group
Groups make it easier to track how a specific cohort is progressing through their certifications. Once you've added members to a group, you can cross-reference their progress using the Progress tab.
From your organization's detail page, click the Progress tab. You'll see every member's exam attempt history, pass rates, scores, and which certifications they've been working through.
To filter by a specific group, at the top of the Progress tab, use the Group filter dropdown. This lets you see how your cohort is performing as a whole, who's scoring high, who's still working through it, and who hasn't started yet.
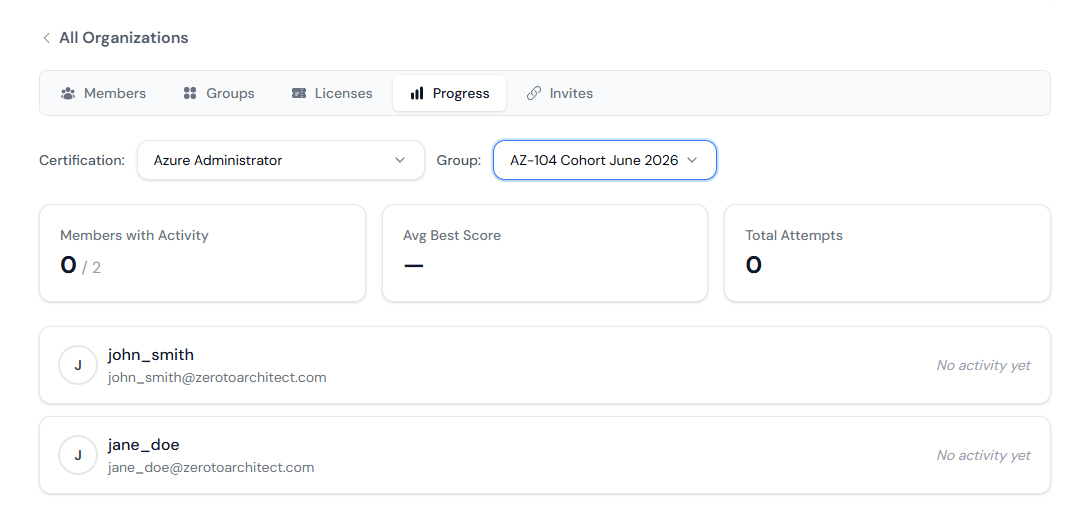
Tip: This is especially useful at the end of a learning sprint — select your cohort group and you'll have a clear snapshot of the results to share with stakeholders or managers.
Assign Licenses to Group Members
If you've just created a new cohort group, you'll likely want to make sure every member in it has a license. Rather than scanning through all your members, you can filter the license assignment view by group.
To do so, click the Licenses tab on your organization's detail page. Your licenses are listed here grouped by product, showing how many are assigned vs. available.
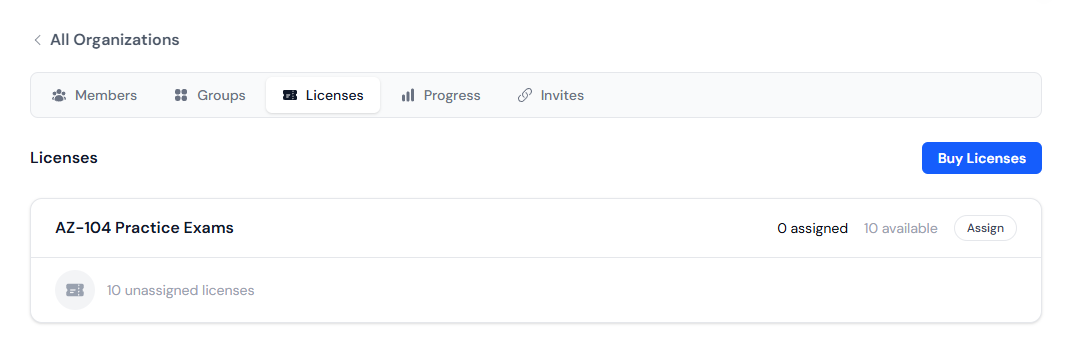
Click the Assign button next to the relevant product. In the assignment modal, use the Group filter to narrow the member list to just the members in your cohort. This makes it easy to spot who in the group doesn't have a license yet.
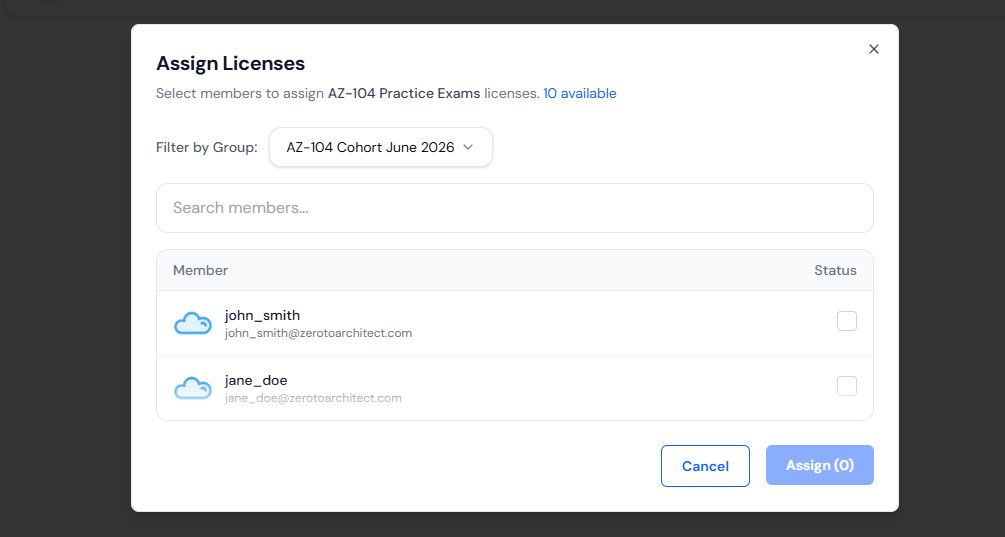
Select the available licenses and the members to assign them to, then click Assign. The members will gain access to the product immediately.
Note: Licenses are assigned to individual members, not to groups. The group filter is just a convenience tool to help you find the right people faster.
Getting Started
Ready to set up your groups? Head to the Organizations item in the header or the link down below and create your first group today. If you have any questions, don't hesitate to reach out to our support team.
Manage your Organizations
Want to pass your next certification?
Practice with independently written, objective-aligned questions. Build understanding, identify weak areas, and plan your next study step.
Azure Administrator
For IT admins managing Azure infrastructure. Covers identity, storage, networks, and compute resources - essential for administration and operations roles.
Azure Solutions Architect
For architects designing cloud solutions on Azure. Covers infrastructure, security, data platforms, and business continuity - essential for leading enterprise cloud initiatives.
Azure Fundamentals
Entry-level certification for beginners in cloud computing. It covers core Azure concepts, services, security, and compliance - ideal for both technical and non-technical roles wanting a foundation in Azure.
Azure Network Engineer
For network engineers managing Azure networking. Covers hybrid connectivity, routing, security, and private access to Azure services - critical for enterprise network infrastructure.
Azure AI Fundamentals
Fundamentals certification for understanding AI concepts and building simple solutions with Microsoft Foundry. Covers responsible AI, generative and agentic AI, speech, vision, language, and content understanding.

ML Ops and Gen AI Solutions
Advanced certification for designing and implementing production AI solutions. Covers RAG architectures, model evaluation, fine-tuning, orchestration, observability, and responsible AI patterns in Azure.